Tuesday, December 24, 2013

12 Cosplays of Christmas - 12 Bells A-Jingling (Santa uniform)

Day 12! ^^ This is it, people! The last recipe of 12 Cosplays of Christmas 2013! Now, for you big and small kids out there, who's coming down the chimney tonight? Santa, of course! ^^ Why do I bring this up? Because to send this sleigh back to the North Pole until next year, I'm doing the second part to my recipe of Mai from 'Itsudatte! My Santa!' Since I already posted her uniform yesterday, today I'm posting a recipe of her Santa suit along with her friends'.

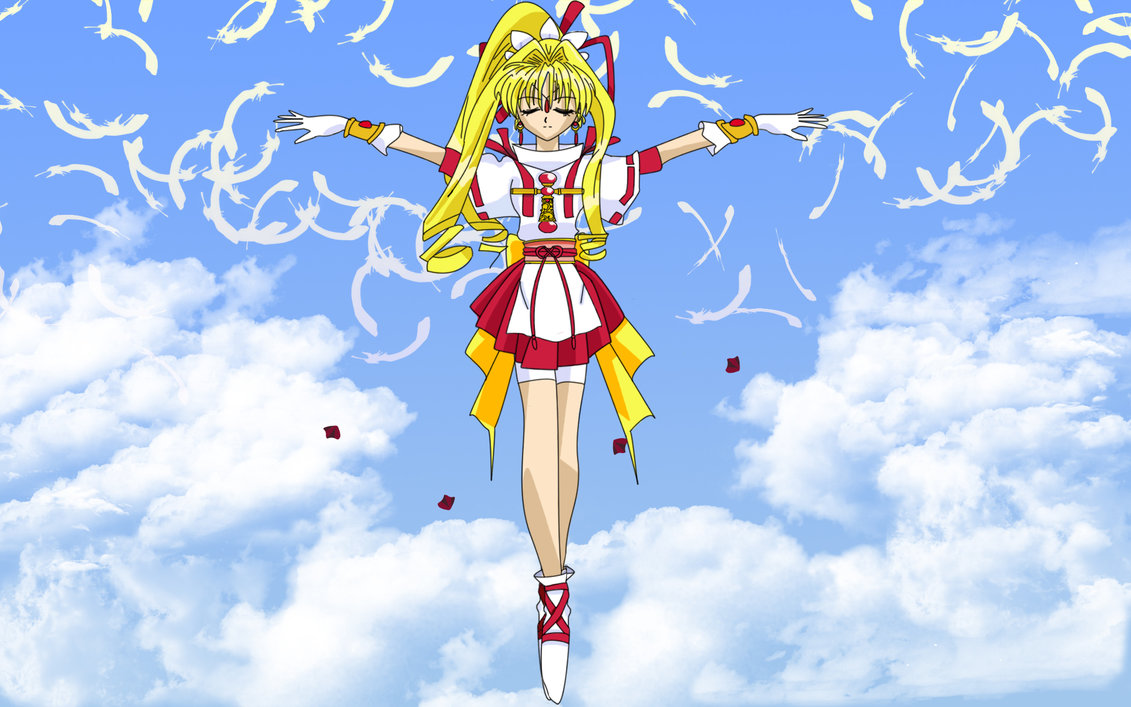
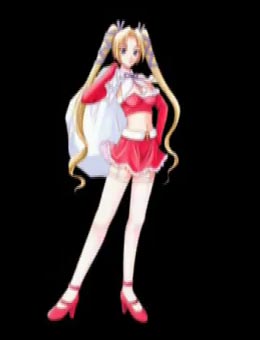
Here's a cover of the Funimation dub of the OVA. ^^ We'll cover the other girls, too!
 
Here's the other Santa girl, Sharry! ^^ Many thanks to the Love Hina Wiki for letting me use this!
 
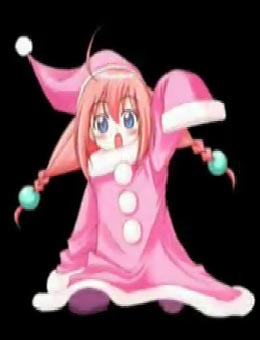
Here's the younger Santa girl, MaiMai! ^^ Ain't she cute? This can be the kids' suit. Again, many thanks to the Love Hina Wiki for letting me use this!
 
There's several ways to make this type of costume, so feel free to do whatever style you want. Here's what you need to assemble the girls:
  • A red strapless dress *Mai*
  • A pink belt *Mai*
  • Red boots *Mai*
  • A red strapless bra *Sharry*
  • A red skirt *Sharry*
  • Long white socks *Sharry*
  • Red Mary Jane heels *Sharry*
  • A white sheet *Sharry*
  • White ribbon *Sharry*
  • A long pink dress *MaiMai*
  • Large white pom-poms (sold at craft stores like Michael's, JoAnn, WalMart, etc.)
  • Long red gloves
  • White faux fur
  • A red or pink Santa hat (sold in most stores during this season)
  • Fabric glue
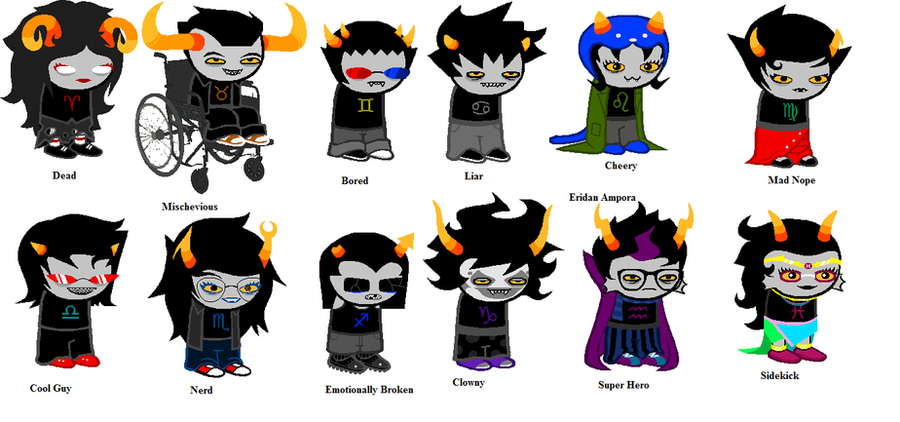
Much like the 'Homestuck' Trolls, we'll focus on the uniform stuff. Here's how to assemble them:
  1. Have somebody line the dress or bra and skirt with the fur and pin it on. They can sew it on or you can sew it on yourself. Do the same for the gloves, hem and cuffs (if you're doing MaiMai).
  2. Afterwards, glue on the pom-poms onto the dress and wait until the glue dries. You can sew these on too, but it's best sewn by hand.
  3. If you're doing Sharry, draw a zigzag shape onto the sheet, cut it out, line the top with ribbon and sew it on. Tie the cape around your neck once you're done. This works better if you drape it over your shoulders and measure it first before drawing the shape.
  4. For Sharry's hair, simply tie your hair into pigtails with strips of ribbon and entwine them in your hair.
  5. For MaiMai's hair, part your hair and tie the bottom part of the pigtails using a close-to-hair-color hairband. Braid the bottom and finish with a beaded hair tie.
  6. Get the rest of the costume on (belt for Mai, socks and heels for Sharry), grab your Santa hat and now you're done!
Sadly, I don't have a recipe for New Year's... However, I will make another post when I return next year for Valentine's Day. Hope you've enjoyed this and 12 Cosplays of Christmas 2013! Oh, one more thing before I'm gone for a month...
 
Have a Merry Christmas 201and a Happy New Year 2014!!! *<^(w)^ .o*

Sunday, December 22, 2013

12 Cosplays of Christmas - 11 Books A-Stacking (Mai *uniform*)

Day 11! ^^ One more recipe! I'll be closing this year's '12 Cosplays of Christmas' with two-parter costume recipes. Unlike the ones I did for V-tine's Day and White Day, I won't be posting these together on the same day. Instead, I'll post one today and post the second tomorrow. Also, instead of a couple, it's two forms of the same character.

Anyway, grab your coats and prep for the cold weather because today's character is Mai from 'Itsudatte! My Santa!'

Here's a picture of Mai and her two forms. ^^ I'll be covering her Santa form, too!
 
Here's what you need:
  • A white Polo shirt
  • A red or brown tie
  • A yellow buttoned sweater
  • An orange plaid skirt
  • White socks
  • Brown loafers
  • Red ribbon
There's not that many instructions for it. Just simply:
  1. Get dressed.
  2. Put your hair behind you, using the ribbon as a headband.
  3. For extra cuteness, bring a reindeer or moose plush with you and you're done!
Hope you've enjoyed! ^^
 
Last line: 12 Bells A-Jingling!!

Saturday, December 21, 2013

12 Cosplays of Christmas - 10 Eggs A-Hatching (Shugo Chara uniform)

Day 10! ^^ Only 2 recipes left! Today, let's make an omelet and not break any eggs because today, it's the uniform from 'Shugo Chara.'

Here's a picture of (almost) everybody! ^^
 
What you need to assemble the uniforms:
  • Sheets of plaid fabric *red for girls, blue for boys*
  • Thick ribbon *red for girls, blue for boys*
  • A white long-sleeved shirt
  • A black dress jacket
  • Matching plaid bottoms *red skirts for girls, blue shorts for boys*
  • White socks
  • Any boots or shoes
Since this one's very short, I'll keep it brief. Here's how to assemble it:
  1. Get dressed and roll the shirt cuffs over those of the jacket.
  2. Drape the fabric over your shoulders and pin some ribbon onto the collar of the fabric. Somebody can sew the ribbon for you.
  3. Once the ribbon is sewn on, tie it to your neck, grab an large Easter egg and now you're done!
Hope you've all enjoyed! ^^
 
Next line: 11 Books A-Stacking!

Friday, December 20, 2013

12 Cosplays of Christmas - 9 Buckets A-Clanking (Trolls)

Day 9! ^^ 3 more recipes! Today, it's the Trolls from 'Homestuck!'

Here they are! ^^ (L-R: Aradia, Tavros, Sollux, Karkat, Nepeta and Kanaya *top*, Terezi, Vriska, Equis, Gamzee, Eridan and Fefer *bottom*) Many thanks to WeirdNerd of deviantART for letting me use this!
 
Since there's so many of these characters, I decided to just focus on the uniform stuff needed. Here's what you need:
  • A black shirt (tank top for Equis, t-shirt for everybody else)
  • Bottoms of any color
  • Colored duct tape
  • Cardboard or posterboard
  • Scissors
  • Black headband (horseshoe style works better then regular stretchy bands)
  • Black and colored hairspray
  • Gray and black face paint
Assembling them is pretty easy, but here's the directions anyway:
  1. Let's start with the horns first. Cut out some cardboard or posterboard and cover the pieces with yellow, orange and red duct tape. Then tape them to the headband and set them aside for after you're done.
  2. Get dressed. Much like the horns and later the makeup, it depends on what Troll you wanna be.
  3. Now for the cosmetics! For the hair, spray some of the black hairspray on your hair (some purple if you're gonna be Eridan).
  4. For the makeup, apply some gray face paint on yourself. Mix some of that paint and a bit of black to make a darker shade of gray and apply that sparingly on your face.
  5. Grab any accessories for your Troll (glasses, tiaras, scarves, etc.) and now you're done! ^^
By the way, folks, I'll be gone early tomorrow, so I'll be posting #10 around midnight and #11 late the following night. Until then, I'm pulling double-duty and getting the rest done, so you guys won't be disappointed. Anyway, hope you've enjoyed!
 
Next line: 10 Eggs A-Hatching!

Thursday, December 19, 2013

12 Cosplays of Christmas - 8 Bouquets A-Tossing (Wedding Peach uniform)


Day 8! ^^ 4 recipes left! Today, let's smell the flowers, hear the bells and gorge on some cake because today's characters are the 'Wedding Peach' girls!
 
Here are the girls! ^^ (L-R: Angel Daisy, Scarlet O'Hara *she really doesn't have a Love Angel name! ^^;*, Wedding Peach and Angel Lily)
Here's what you need for them:
  • Gold felt or fabric (satin or silk looks a lot better!)
  • Yellow ribbon *Wedding Peach*
  • A red dress *Wedding Peach*
  • A white skirt
  • A leotard of any color
  • White bra cups (yes, those exist and are sold separately, ladies!)
  • Any shoes or boots
  • Scissors
You can pick whatever color you want for the leotard, but if you want to be a specific character:
  • Daisy - yellow
  • Scarlet - purple
  • Peach - red
  • Lily - blue
How to assemble the team:
  1. Put on the leotard, the white skirt and the cups. For best results, the cups should be sewn on by hand or get some heavy-duty tape to keep them on. For Peach, put on a red skirt, cut part of the white skirt off and put them on.
  2. Cut out some of the felt for the trim (i.e. shoulder armor, garters, etc.). Apply them to the appropriate areas according to the picture.
  3. Grab whatever boots or shoes you have, do your hair however you want it and now you're done! ^^
Next line: 9 Buckets A-Clanking!

Wednesday, December 18, 2013

12 Cosplays of Christmas - 7--WHATEVERS2009!!

Day 7! ^^ Oh, my glob! We've hit the week mark! Today, we'll be doing yet another humanization costume. Last year, we did Pinkie Pie from MLP; this year, it's everybody's favorite valley-cloud, Lumpy Space Princess from 'Adventure Time!'

Here's a picture of LSP. ^^ We'll use the lumps as a model for the costume. Many thanks to the Adventure Time Wiki for letting me use this!
 
Here's what you need to lump yourself up:
  • A purple fluffy dress
  • Purple color hairspray
  • Purple gloves (optional)
  • Barrettes
  • Yellow felt
  • A curling iron
  • Purple face paint
  • Scissors
How to become lumpy:
  1. Put on the dress and if there's any kind of fluffy stuff on it (feathers, lace, petticoats, etc.), ruffle it up.
  2. Now for the hair! Simply heat up the curling iron and begin curling when it's ready. If your hair's naturally curly, you can skip this step. Have somebody spray your hair purple after curling it.
  3. For the little star, simply cut out a star shape out of the felt. Open a barette, glue the star to it and leave it to dry.
  4. While waiting for the glue to dry, have somebody paint your face purple. Same for the arms if you don't have any purple gloves.
  5. Once the glue's dry, clip the barrette onto your hair and now you're done!
Hope you, like, totally enjoyed this recipe! Oh, glob, mah beans! O.Q

Next line: 9 Bouquets A-Tossing!

Tuesday, December 17, 2013

12 Cosplays of Christmas - 6 Ribbons A-Twirling (Jeanne)


Day 6! ^^ We have hit the halfway mark, folks! Today, we'll be doing Jeanne from 'Kamikaze Kaitou Jeanne!'
 
Here's a pic of her! ^^ Many thanks to Fanpop for letting me use this!
 
Here's what you need:
  • An oversize white shirt
  • A red dress
  • A white apron
  • White shorts
  • Ribbon in red (both thick and skinny) and yellow
  • White gloves
  • Gold or yellow and orange felt
  • White boots
How to assemble it:
  1. Get dressed, aside from the shirt. Cut out some of the thick red ribbon for the sleeves, shoulders and boots. Hand the shirt and the bits of ribbon to somebody or you can DIY (do it yourself).
  2. Once the sewing is done, put on the shirt, cut out long pieces of the skinny red ribbon and set them aside.
  3. Take one of those strips of skinny ribbon and put your hair in a ponytail.
  4. For the belt, wrap some of the orange felt around your waist and sew the ends together by hand. Same with the yellow felt on the gloves, but you'll have to cut it out before sewing them on.
  5. Make a bow out of the yellow ribbon and have somebody pin this for you. Wrap the boots with the last two strips of the thick red ribbon. Do the same with the skinny ribbon and the felt and you're done! ^^
Hope you enjoyed! ^^
 
Next lines: 7 Shots A-Slinging!

Monday, December 16, 2013

12 Cosplays of Christmas - 5 Bright Blazes (Flame Princess/Prince)


Day 5! ^^ When you think of winter and Christmas, what usually comes to mind? Warmth, of course! The fresh hot cookies, the steamy hot cocoa and, the ruler of winter warmth, a fire in the hearth... *sigh* =w=

Why would I bring this up? Because today's character is Flame Princess/Prince of 'Adventure Time!' ^^

Here's a model sheet of Flame Princess! ^^ Many thanks to the Adventure Time Wiki for letting me use this!
 
Here's a sketch of Flame Prince! ^^ Again, many thanks to the Adventure Time Wiki for letting me use this!
 
 
Here's what you need for both of them:
  • Red and orange hairspray
  • Orange and yellow face paint
  • An orange gown *Flame Princess*
  • An orange jumpsuit *Flame Prince* (make sure the legs are tuckable!)
  • Red ribbon *Flame Princess*
  • An orange sheet *both*
  • Red boots *Flame Prince*
  • Scissors
  • Sewing kit
Let's start with Flame Princess first. How to assemble her:
  1. Put on the dress.
  2. Take the orange sheet and have somebody draw where to cut it. Once it's finished, have him or her cut it out.
  3. Cut out some ribbon and somebody can pin it to the cut-out sheet and run through the sewing machine. Get everything on.
  4. Now for the makeup and hair! Grab a towel and drape it over your shoulders. Mix the orange and yellow paints together on a paper plate and have somebody paint it on your face and arms.
  5. For the hair, put it in a low ponytail and lift it upwards. Somebody can do the orange spray first and then tip it in red. Sculpt the ends of the tail to make the flames, make the gem out of red and you're done!
Now, for Flame Prince! (NOTE: The best way to sport this look is to wear the suit backwards so the zipper can be accessible. Also, you may need a Mohawk for this, too!)
  1. Put on the jumpsuit and cut out some red ribbon and fabric. Somebody can pin it and later sew it on. They can also cut off the sleeves.
  2. Once the suit is done, have somebody spray your hair orange and tip it in red and paint your face and arms.
  3. For the boots, use any scrap orange fabric and apply it to them. Make some gems and add them to your head and boots, make some wristbands out of red and you're done!
Hope you've enjoyed! ^^
 
Next line: 6 Ribbons A-Twirling!

Sunday, December 15, 2013

12 Cosplays of Christmas - 4 Singing Witches (DoReMi uniforms)

Day 4! ^^ Karoo, karra, karee! Today's costume is from 'Magical DoReMi!'

Here are the girls! ^^
 
 Here's what you need to assemble it:
  • A witch hat sewing design (can be ordered online outside of Halloween)
  • A dress of any color
  • White, darker and matching fabric
  • Ribbon of any color
  • Gloves of any color
  • Colored lace
  • Matching boots (cowboy and heeled ankle boots work better!)
How to assemble it:
  1. Have somebody make the hat out of white and whatever color fabric you want. Since this is a more individual uniform, you can use whatever colors or designs you want on it.
  2. Once the hat is done, begin cutting leaf or cat-eye shapes out of whatever fabric you have. If you're wondering, it's four matching, five white and two dark. Pin the shapes down on the skirt along with some corresponding colored lace.
  3. Cut a large diamond shape out of the white and repeat step 2.
  4. After running it through a sewing machine, onto the boots! Take some strips of white and glue them to the shoes. Do the same with bits of ribbon and finally topping it with a bow.
  5. Simply glue some lace onto the rim of the gloves and now you're done!
Next line: 5 Bright Blazes!

Saturday, December 14, 2013

12 Cosplays of Christmas - 3 Golden Bells (Dejiko)


Day 3! ^^ Today, time to bring out your scratching posts and plush mice because today's character is Dejiko from 'Di Gi Charat!'


Here she is! ^^
What you need:
  • A white beanie
  • White and pink felt
  • Large foam balls
  • Green, yellow and black craft paint
  • A plain white sock
  • Plush stuffing
  • A white apron
  • A blue dress
  • White faux fur
  • White furry legwarmers (if needed)
  • Blue ribbon
  • Newspaper
How to assemble it:
  1. Begin by gluing the white and pink felt together and cutting out large triangles. These will be the ears on the hat.
  2. Fold the ears into a cone shape, flip the beanie inside out and pin them down. Have somebody run it through a sewing machine and set aside.
  3. Lay down some newspaper on the ground or table. Take one of the foam balls, cut it in half and paint the halves green with a black line coming down the middle. They have to look like cat eyes!
  4. Take three more balls and paint them yellow with black. They need to look like bells! Let them dry for a bit with occasional turns to make sure the paper doesn't stick.
  5. Put some newspaper inside the beanie and glue on two of the bells and the eyes. Let the glue dry and remove the paper.
  6. For the gloves, trace your hand on the leathery side of the fur and cut it out. This may require two sheets, so do the same with the other side of your hand. Have someone sew them together threw a sewing machine.
  7. Now for the boots! If you have legwarmers, simply sew an additional piece of fur onto them so it'll go over your shoes. If not, just make some out of a few more sheets of it.
  8. For the tail, take the sock and fill it with the plush stuffing. Leave it until the costume is done.
  9. Now to get everything ready! After getting the dress and apron on, have somebody safety pin the tail onto the dress and tie a ribbon on it. Grab the gloves, boots and beanie.
  10. For the collar, simply take some ribbon, tie it around your neck (not to the point of strangulation!) and glue on the last bell. Wait until the glue dries and now you're done!
Next line: 4 Singing Witches!

Friday, December 13, 2013

12 Cosplays of Christmas - 2 Divine Sisters (Belldandy)

Day 2! ^^ Today, it's Belldandy of 'Oh! My Goddess.'

Here's a wallpaper of Belldandy and her sisters, Skuld (left) and Urd (right). ^^ Many thanks to New-Anime for letting me use this! 
 
What you may need for this:
  • A long flowy white dress
  • A blue satin robe (any type of skinny fabric will do)
  • Blue legwarmers
  • Matching blue gloves
  • Purple face paint
  • Yellow or gold felt
  • Any gold jewelry
  • Angel wings (optional)
  • Bobby pins
  • Hairspray
How to assemble it:
  1. Put on the dress and the robe, but leave out the sash. Cut off the sleeves on the robe.
  2. Cut out or make a long mountainous ribbon for the cuffs and the sides of the robe. Have someone pin them down for sewing.
  3. Once the sewing is done, have someone make the hair using the bobby pins and hairspray. After the hair is hard from the hairspray, let someone do the paint on your face.
  4. Put on the robe and any remaining pieces of clothing, slap on some gold jewelry and now you're done! ^^
Hope you enjoyed!
 
Next line: 3 Golden Bells!

Thursday, December 12, 2013

12 Cosplays of Christmas - A Giant Bottle of Vodka (Russia)

Ciao, folks! ^^ It's that other time of year again! It's Christmas and that means another year of '12 Cosplays of Christmas!' For those new to this, it's very similar to '13 Cosplays of Halloween,' but with one less costume and it works with any con in December. This year, I decided to move it from the 13th through Christmas Day to the 12th (today) all through Christmas Eve.

Let's head into the cold mountains of Russia because to start this sleigh ride, the character of the day is Ivan Braginski/Russia of 'Axis Powers Hetalia.'


Here's Russia! ^^ Many thanks to the Hetalia Archives Wiki for letting me use this!
 
What you'll need for this:
  • A long tan coat
  • Tan felt
  • Brown ribbon
  • Black or brown gloves
  • Green pants (not too bright!)
  • Brown boots
  • A white or pink scarf
How to assemble it:
  1. Put on the coat and have somebody cover up the buttons with the ribbon (if any). Since the cover-up is temporary, have someone either put safety pins on it behind the coat. Same with the cuffs.
  2. Cut out some diamond shapes (think Rupees from Zelda) out of the felt, sew some ribbon onto the borders and safety pin them to the coat.
  3. Get yourself dressed, slap on the scarf and now you're done!
Next line: 2 Divine Sisters!