Sunday, April 20, 2014

Easter 2014 - Berii Shirayuki (Tokyo Mew Mew A La Mode)

Hey, guys! ^^ Bri here. Today, it's a day full of eggs, candy and bunnies! Yep, it's Easter! ^^ And speaking of bunnies, we'll be focusing on my favorite Mew Mew, Berii Shirayuki.

Here's a picture of her! ^^ Many thanks to Zerochan for letting me use this!
 
Sadly, I couldn't find a good colored picture of her, so just bare with me on this... Anyway, here's what you need for Berii:
  • A white or creamish-yellow balloon dress
  • Ribbon in both dress's colors and red
  • White lace
  • Round or 'jingle' bells
  • Matching white or yellow gloves
  • White or yellow boots
  • Bunny ears
  • A white cat tail
Here's how to assemble the costume:
  1.  Put on the dress and the boots. Have somebody cut up the gloves, so the cuffs look jagged and triangular.
  2. Take some ribbon (the one that's the same color as the dress), cut it off and make a couple tailless bows. Somebody can safety-pin these to the sides of your hips.
  3. Repeat step 2 with the red ribbon, but this time, the bows have tails. For the garter, line one strip of ribbon with the lace, sew it on and slip it onto your thigh. For the other one, tie it to your cat tail and sew on a small bell.
  4. Pin your tail to the dress, slip on some bunny ears and you're done! TIP: For a better effect, align the tail with your coccyx (a.k.a. your tailbone) and pin it there on the dress.
Hope you enjoyed and...
Have a happy Easter! =^v^=

Thursday, March 27, 2014

I'm Sorry!

I deeply apologize for a long absence. I decided to use my computer less often because my hand felt like it was gonna have Carpal Tunnel. Ouch... That and I'm very busy cleaning out my room. I'm getting a new bed. Yay~ ^w^

Anyway, I promise I'll make an Easter recipe in April to make up for it. Again, I'm deeply sorry for the long absence...

Saturday, March 1, 2014

Hinamatsuri 2014 - DIY Doll Display

Hey, guys! Bri here! ^^ I thought I'd do a filler recipe until St. Patty's, so here it is: How to do your own Hinamatsuri doll display using figures and toys found around the house.

For those who are wondering what Hinamatsuri is, it's a holiday in Japan, also known as Girls' Day. Traditionally, there's a group of dolls that are displayed to represent the wedding of a Heian emperor and empress. The displays can vary from three tiers to a tall seven. As the name implies, the holiday is mostly focused on young girls, with the dolls acting like good luck charms for health, growth, love and marriage in their future.

Here's an example of a three-tier display. We'll use this as a model. I forgot who let me use this, but many thanks to them! ^^ If this is your pic, kind sir or ma'am, I'll kindly credit you for it.
 
Here's my display! ^^ Cute, isn't it? I know it looks pretty ghetto, but I don't really have that many materials needed to make real ones.


These can be pretty easy to make, so here's what you need:
  • Long cardboard boxes in any size
  • Several figures, figurines or plushes
  • Old t-shirts (one blue for the emperor, one red or pink for the empress)
  • Construction paper
  • Pink or gold ribbon
  • A red blanket
  • Glue
How to assemble it (I'll add notes about mine on these, just so you know.):
  1. Look for a large empty spot in either the living room or any room in the house. Stack the boxes up into some stairs. Glue the boxes together and after it's dry, drape the blanket over them. For mine, I have it in my bedroom using an extra end table, some paintings of mine and some manga magazines. For the blanket, I used a Spiderman blanket as you saw in the second picture.
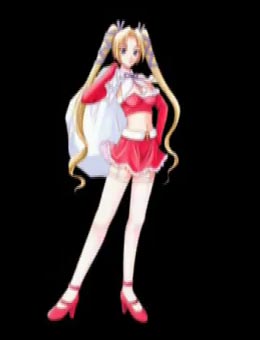
  2. For the emperor and empress, you can use any kind of toys and fit them into the shirts. I would recommend using plushes, so you wouldn't have to cut up the shirts to make the kimonos. For mine, I used my two Build-A-Bears, Steven the Triceratops as the emperor and Daryl the cat as the empress.
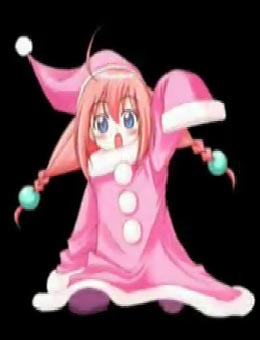
  3. For the rest, it's three figures on the second shelf and five figures at the bottom. For mine, I just used some ceramic figurines. In a regular Hinamatsuri display, the second-shelf dolls are the court maidens that bring sake (saw-keh, more commonly known in the West as rice wine) and the bottom shelf are the musician that play at the wedding (three drummers, a flute player and a singer).
  4. Now for the accessories! Just snip out some ribbon and lots of shapes out of construction paper.* The ribbon will be used as the empress' headdress.
  5. Bring in a couple small bowls between the maidens and throw in some candy (it's supposed to bring in extra luck, according to an issue of Shojo Beat!). Put a sheet of yellow or gold paper behind your royal couple and now you're done! ^^
*The things needed to be cut out of paper include:
  • The emperor's hat and baton, known as a shaku (shock-koo)
  • The empress' fan
  • The maidens' sake equipment
  • The musicians' instruments, which include three different types of drums, a striped flute and a fan for the singer
Oh, another thing before wrapping this up, you have to put the dolls away exactly on the 3rd of March. According to tradition, it could mean a late marriage for the girls if they're up past that date. My suggestion to avert leaving the display up is to take pictures of it. Anyway, hope you enjoyed, good luck and...

偉大なひなまつりを持っている! (Have a great Hinamatsuri!)

Friday, February 14, 2014

Valentine's Day 2014 - Kyo (Fruits Basket)

Here's part 2 of my Valentine's recipes! ^^ Now it's Kyo's turn!

Here's a pic of him! ^^ Many thanks to Hannou for letting me use this!
 
Here's his outfit! ^^ Many thanks to Joyfay for letting me use this!

 
Here's what you need:
  • Black and white long-sleeved shirts
  • Matching black pants
  • White shoes
  • A short orange wig
  • Black and white beads
  • Yarn or elastic
This one's very short and sweet. How to assemble Kyo:
  1. Start with making the bracelet by running the beads, black and white alternatively. Tie it around your wrist.
  2. Get dressed.
  3. Put on the wig, make sure it's comfy and snug and you're done!
Hope you've enjoyed, join in next month for White Day and St. Patrick's Day and...
Happy Valentine's Day! <3

Wednesday, February 12, 2014

Valentine's Day 2014 - Tohru Honda (Fruits Basket)

Hey, folks! ^^ Today's a very beautiful holiday... No, not Christmas. Not Easter. Not even International Flying Spaghetti Monster Appreciation Day! >w< It's Valentine's Day. Chocolate, hearts and love fill up the air. To celebrate this very sweet holiday, I'm gonna post two recipes back-to-back of a classic anime couple.

Last year, I did Luffy and Nami from 'One Piece.' This year, it'll be Tohru and Kyo of 'Fruits Basket.' ^^ Sorry, Tohru/Yuki fans!

Here's a picture of her. ^^ Many thanks to the Fruits Basket Wiki for letting me use this!
 
Here's what you need for her:
  • A white collared long-sleeved shirt
  • A blue long-sleeved shirt
  • Blue and white ribbon
  • A white tie
  • A Cami Secret in white
  • A blue skirt
  • Dark blue socks
  • Brown loafers
How to assemble it:
  1. Get dressed, save for the shirts, the Cami Secret and the tie.
  2. Cut the tie, so it has a flat bottom.
  3. Cut out some of the ribbons. Lay the strips of the blue ribbon onto the collar and cuffs of the shirt, the Cami Secret and the tie. Have somebody sew them on.
  4. Similar to step three, cut out some white ribbon and lay them on the bottom of the blue shirt. Have somebody sew that on, too.
  5. Put on everything else, add some blue ribbon to your hair if you want the actual Tohru look and now you're done!
Any other accessories can include either a toy rat (for Yuki) or a toy cat (for Kyo) to take with you. Hope you enjoyed! ^^
 
Next up: Kyo!

Friday, January 31, 2014

Chinese New Year 2014 - Applejack (MLP *Equestria Girls*)

Hello, folks! ^^ It's me, Bri. Y'all have a good year so far? Anyway, let's get to the first post of 2014. ^^; Today, we slither out of the Year of the Snake and gallop into the Year of the Horse because we'll be focusing on Applejack from MLP: Equestria Girls!

Here she is! ^^ Many thanks to the MLP Wiki for letting me use this!
 
Here's another pic! ^^ Many thanks to Colorpaletpony of dA for letting me use this!
 
Here's what you need for this:
  • A brown or plain straw cowboy hat
  • A white long-sleeved collared shirt
  • Green clothing dye
  • A brown belt
  • A denim skirt
  • Brown cowboy boots
  • Red and green felt
  • Scissors
  • Rubberbands
  • Gorilla or any other fabric glue
Here's how to assemble it:
  1. Tie the sleeves and bottom half with rubberbands, make the dye and dip the top half in it. Hang it upside down to dry (by the sleeves and hem of the shirt). NOTE: This is to be done outside and with an apron! Dyes will stain wood, carpet and fabric and may become permanent.
  2. Cut out some apple shapes from the red felt and some stems and leaves out of the green felt. Glue six of the apples and the stems onto the boots and leave it alone to dry.
  3. Once the glue's dry on the boots and the dye's dry on the shirt, get dressed! Safety pin the last apple onto your belt, put on a cowboy hat and you're done!
Hope you enjoyed, Gong Hey Fat Choy (Happy Chinese New Year) and have an awesome Super Bowl Sunday! Go SeaHawks!!

Tuesday, December 24, 2013

12 Cosplays of Christmas - 12 Bells A-Jingling (Santa uniform)

Day 12! ^^ This is it, people! The last recipe of 12 Cosplays of Christmas 2013! Now, for you big and small kids out there, who's coming down the chimney tonight? Santa, of course! ^^ Why do I bring this up? Because to send this sleigh back to the North Pole until next year, I'm doing the second part to my recipe of Mai from 'Itsudatte! My Santa!' Since I already posted her uniform yesterday, today I'm posting a recipe of her Santa suit along with her friends'.

Here's a cover of the Funimation dub of the OVA. ^^ We'll cover the other girls, too!
 
Here's the other Santa girl, Sharry! ^^ Many thanks to the Love Hina Wiki for letting me use this!
 
Here's the younger Santa girl, MaiMai! ^^ Ain't she cute? This can be the kids' suit. Again, many thanks to the Love Hina Wiki for letting me use this!
 
There's several ways to make this type of costume, so feel free to do whatever style you want. Here's what you need to assemble the girls:
  • A red strapless dress *Mai*
  • A pink belt *Mai*
  • Red boots *Mai*
  • A red strapless bra *Sharry*
  • A red skirt *Sharry*
  • Long white socks *Sharry*
  • Red Mary Jane heels *Sharry*
  • A white sheet *Sharry*
  • White ribbon *Sharry*
  • A long pink dress *MaiMai*
  • Large white pom-poms (sold at craft stores like Michael's, JoAnn, WalMart, etc.)
  • Long red gloves
  • White faux fur
  • A red or pink Santa hat (sold in most stores during this season)
  • Fabric glue
Much like the 'Homestuck' Trolls, we'll focus on the uniform stuff. Here's how to assemble them:
  1. Have somebody line the dress or bra and skirt with the fur and pin it on. They can sew it on or you can sew it on yourself. Do the same for the gloves, hem and cuffs (if you're doing MaiMai).
  2. Afterwards, glue on the pom-poms onto the dress and wait until the glue dries. You can sew these on too, but it's best sewn by hand.
  3. If you're doing Sharry, draw a zigzag shape onto the sheet, cut it out, line the top with ribbon and sew it on. Tie the cape around your neck once you're done. This works better if you drape it over your shoulders and measure it first before drawing the shape.
  4. For Sharry's hair, simply tie your hair into pigtails with strips of ribbon and entwine them in your hair.
  5. For MaiMai's hair, part your hair and tie the bottom part of the pigtails using a close-to-hair-color hairband. Braid the bottom and finish with a beaded hair tie.
  6. Get the rest of the costume on (belt for Mai, socks and heels for Sharry), grab your Santa hat and now you're done!
Sadly, I don't have a recipe for New Year's... However, I will make another post when I return next year for Valentine's Day. Hope you've enjoyed this and 12 Cosplays of Christmas 2013! Oh, one more thing before I'm gone for a month...
 
Have a Merry Christmas 201and a Happy New Year 2014!!! *<^(w)^ .o*