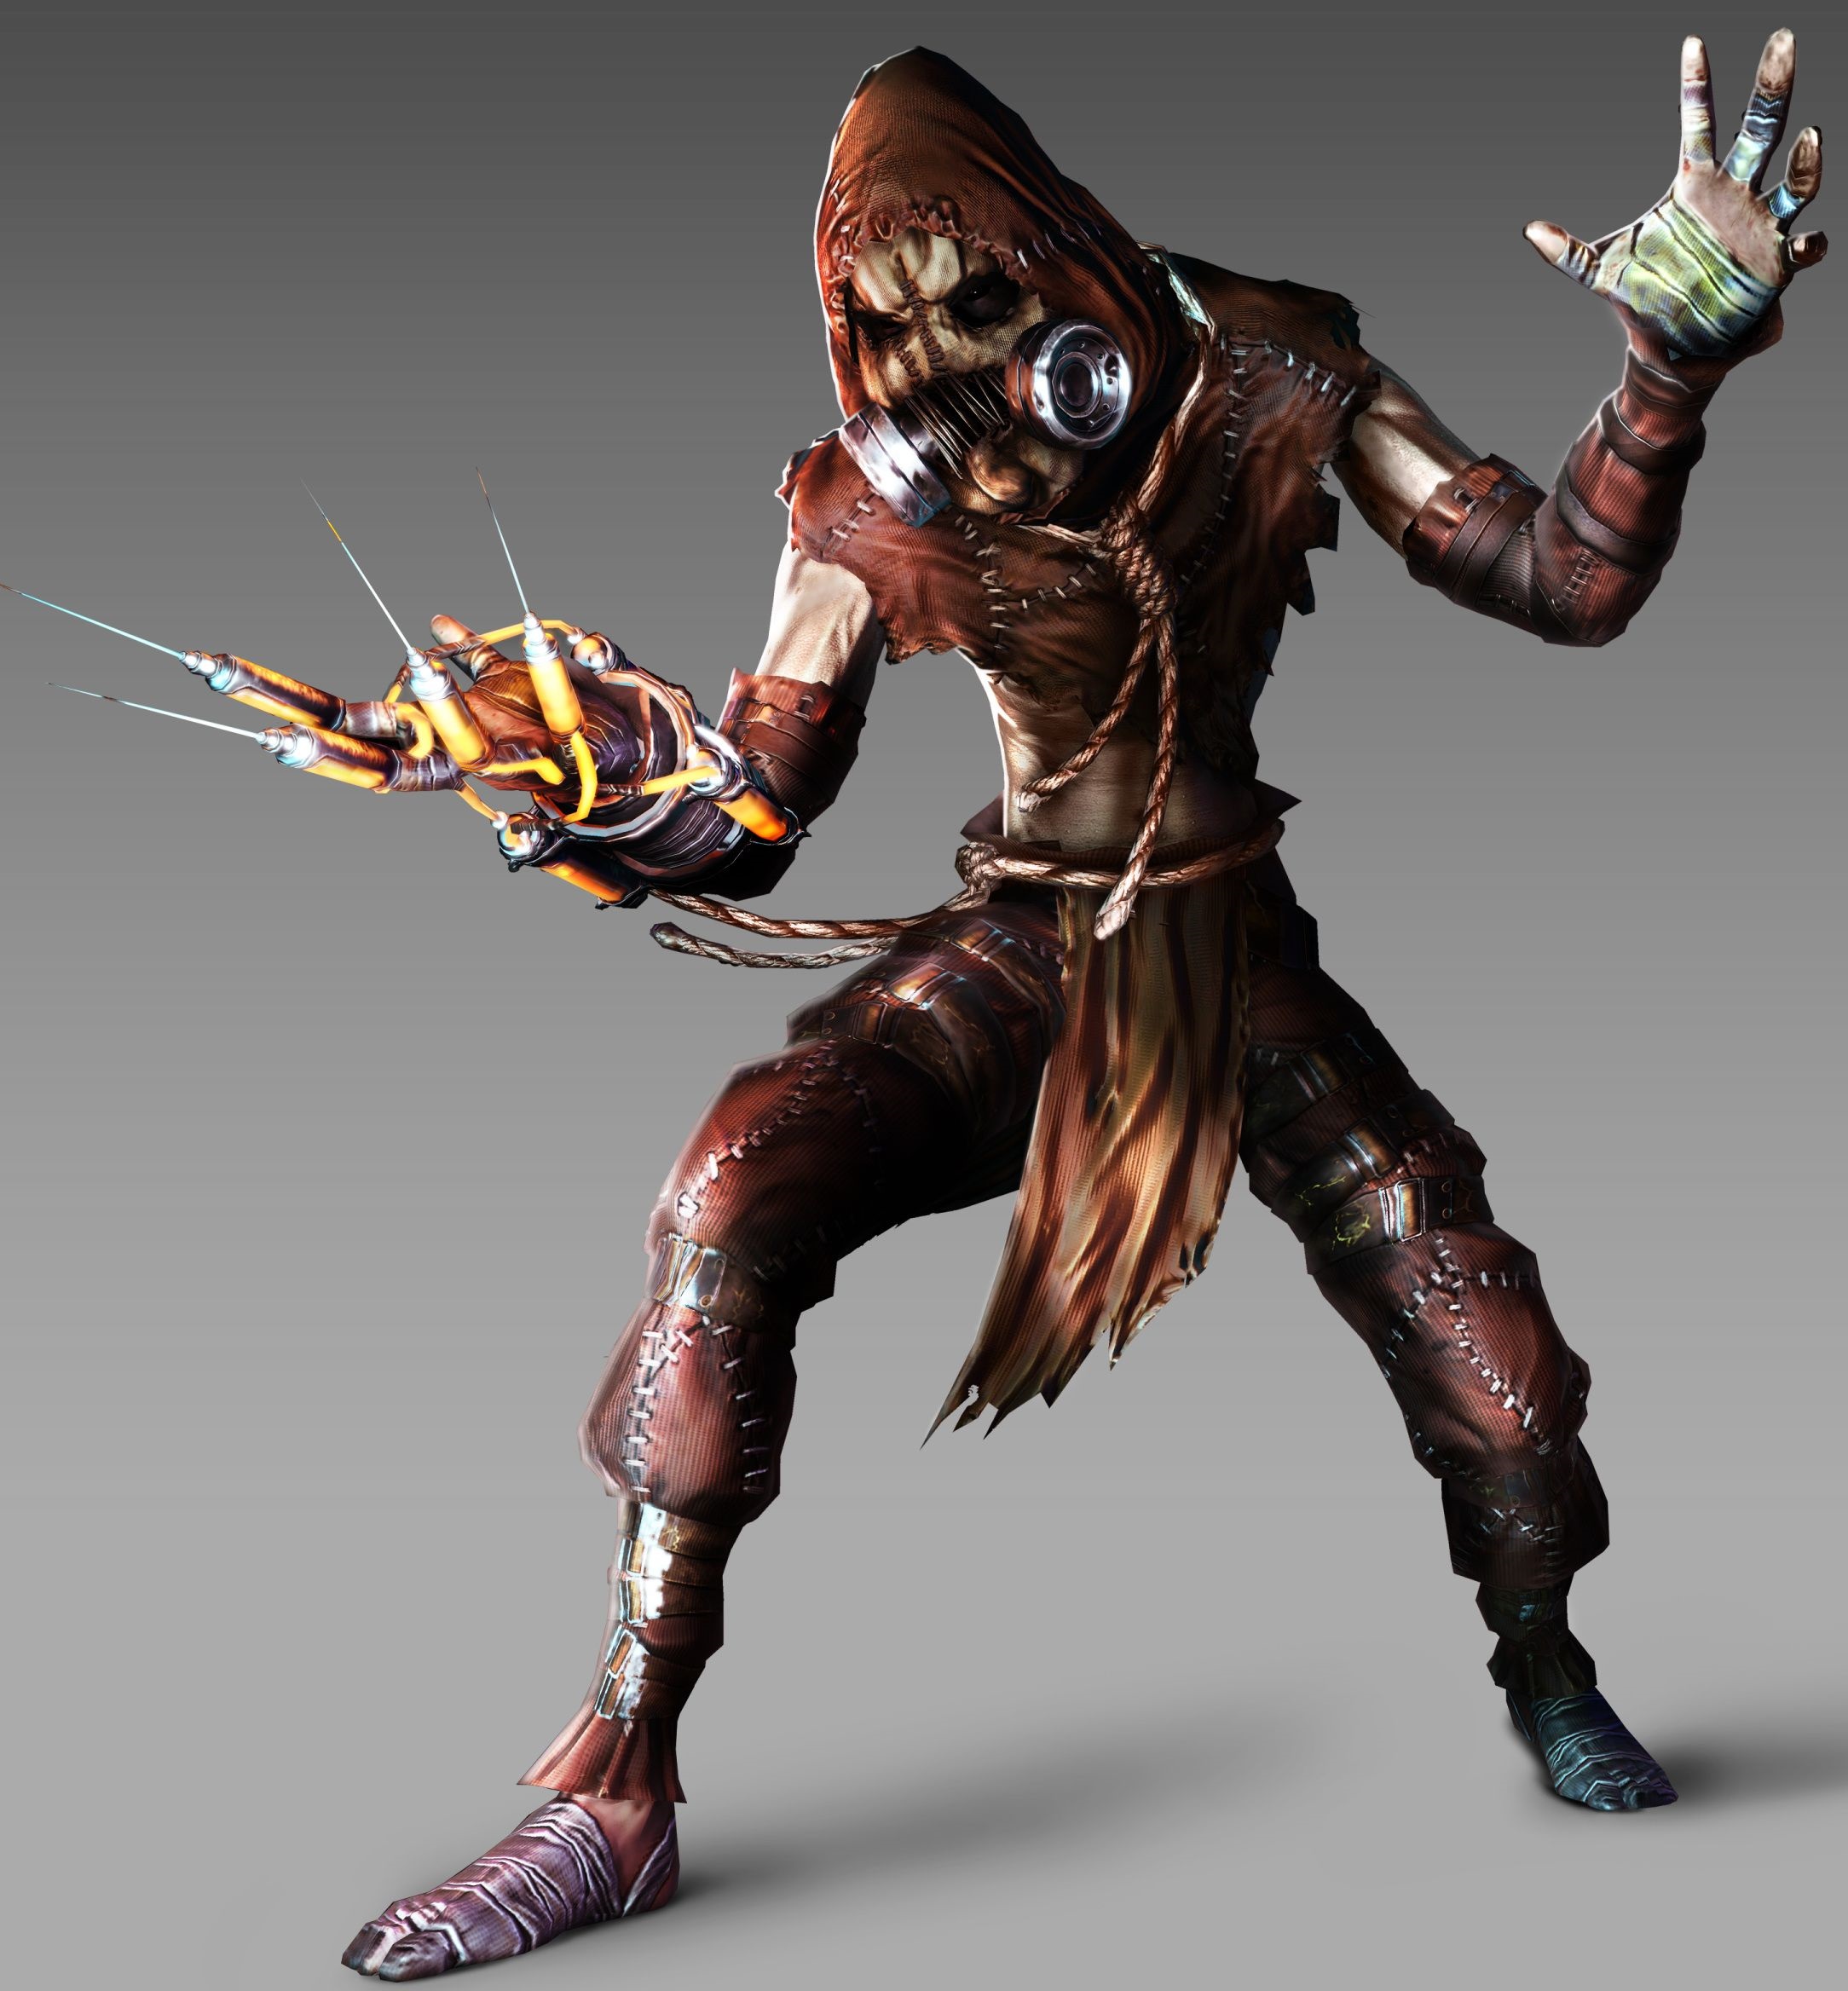
Here's a pic of him! Scary, huh? Many thanks to the Batman Wiki for letting me use this! ^^
Oh, here's a bit of a warning: If you suffer from any breathing problems (asthma, shortness of breath, etc.), this costume is not for you! Here's what you need:
- A half-face dust respirator (like a Reinhardt mask without the goggle bit)
- A burlap sack
- Rope
- Brown pants
- A brown thin hoodie (Be sure nobody wants it anymore!)
- Silver flats
- Silver duct tape
- Gray bandage wrap
- Jello shot syringes (NO NEEDLES!)
- Brown leather gloves
- Scissors
- Yellow rubber tubes
- Clear plastic tubes
- Yellow craft paint
- A black fabric marker
- Glue dots
Here's how to assemble him:
- Cut the burlap bag, so it'll look like a sheet of burlap. Put it on your face gently and have somebody trace around where your eyes and mouth are with the marker. They can cut those areas up when the tracing is done and the burlap is away from your face.
- After the mask is made, put on the dark brown hoodie. Cut it up so it looks shredded and tattered. The scraps can be used for Scarecrow's loincloth later on.
- Put on the pants and flats. Cut up the cut remains of the hoodie to make the loincloth.
- Put on the gloves and stick the Jello shot syringes inside the fingers. If the syringes fit, then pull them off and set them aside. I highly recommend that you use the wider ones, so your fingers won't get stuck inside them.
- Trace your wrist on the right glove, take it off and cut off the hand part of it.
- Now for the syringes of fear toxin! Fill the syringes and the plastic tubes with the craft paint, pour the paint out and leave them to dry. Put the gloves back on.
- If you know how to make knots, make a hangman's noose out of the rope and set it aside. Put the cut hoodie cloth from step 3, place it on the front of your pants and using some more rope, tie it to them.
- Wrap the duct tape around the flats. Wrap the bandage around your right hand, the pants and gloves. Do a 'flex test' to see if you can still move with the bandages. You still need to take off the costume for bathroom breaks.
- By now, the paint on the syringes is probably dry, so slip them into your left gloved hand. Use the glue dots to glue both painted plastic tubes to the bandages.
- Measure how long the rubber tube is from your middle finger to the right tube. Cut it and tape it at both ends. Repeat with the rest until you get the desired look according to the picture.
- For the rest of the costume, put on the respirator and the shredded hoodie.
- Put down the hood and put the burlap mask over your face. Somebody can sew the mouth loosely so only the breathing cans are poking out. Put the hood back up, stuff any leftover burlap aside and now you're done!
Like I said in September, I'm gonna be take a bit of a break and prep for my annual '12 Cosplays of Christmas' event. Hope you enjoyed both this recipe and 13 Cosplays of Halloween 2014 and...
Have a happy Halloween! ^w^
No comments:
Post a Comment